Bathroom Remodeling Lexington KY is a great way to add value to your home. It’s also an opportunity to customize the space to fit your unique needs and style preferences.
The first step is to set a budget. Then you can start researching materials and fixtures. Be sure to consider labor and installation costs.
One of the biggest challenges homeowners face during a bathroom remodel is keeping their budget under control. The temptation is to splurge on the perfect tile or gorgeous freestanding tub, but the cost of these items can quickly add up. Choosing high-quality materials, maximizing space and adding efficiency improvements can help keep costs under control.
The most important factor in determining the cost of your bathroom remodel is what you plan to change. Moving a toilet, sink or bathtub can significantly increase the price of your remodel, as can replacing outdated plumbing and electrical wiring. If you’re remodeling an older home, these costs are even higher due to potential hidden water damage and structural issues.
Another important consideration is whether you’re doing a full remodel or simply changing out some fixtures and tiling. For example, refinishing your existing bathtub is significantly cheaper than installing a new freestanding tub. Likewise, refinishing your existing shower curtain is much less expensive than installing a new glass enclosure.
Skilled labor can also significantly impact the final cost of your remodel. It takes a lot of experience to know how to install a bathroom correctly, especially when working in an enclosed, wet environment. Hiring a skilled contractor will not only save you time and money, but it will ensure your renovation is done properly and won’t become a costly problem down the road.
Material and installation costs should account for 30% to 50% of your total bathroom remodeling budget. Depending on the options you choose, these costs can range from $400 to $1,500 for a new toilet and $3,000 to $10,000 for a new vanity, according to Johnson. Additionally, the type of faucet you choose will greatly influence your cost. For instance, a faucet with a brass body will cost more than one made of plastic. It’s also recommended that homeowners set aside 10-15% of their budget for unexpected problems and extra costs. This will give them some leeway if unforeseen expenses like leaks or mold appear during construction. This is especially important in older homes where costly surprises can occur more frequently.
Design
Whether you want to redo the paint job or do a full bathroom remodel, it’s important to make a plan for how you will use your new space. This will help you determine what features you need, and how much money you can spend on them. The more detail you can put into your design, the more likely you will be to enjoy your remodeled bathroom for years to come.
If your bathroom is small, you may need to get creative when it comes to storage. For example, if your cabinet has doors that swing inwards and eat up space, consider switching to sliding or pocket doors. This will open up your bathroom and save you valuable floor space that you can use for something else.
Another way to maximize space is to add a wall-mount sink. This will free up room underneath the sink and make it easier to clean around the faucet. It’s also a great way to add an extra level of storage without taking up any additional floor space.
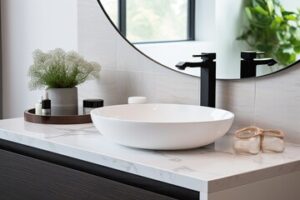
The design of your bathroom will depend on your style and needs, but you should keep in mind that the right color palette can make a big difference. For example, earthy tones like moss green, sandy beige and soft gray can create a relaxing vibe. You can also add natural elements, like plants and fresh flowers, to bring a sense of warmth to the space.
While you’re at it, you might want to update your light fixtures as well. This will help you save energy and money on your electric bill. You might also want to upgrade your ventilation system, which will help keep the air in your bathroom clean and healthy.
If you are doing a full bathroom remodel, you should include the cost of replacing your toilets and other fixtures. It’s a good idea to get estimates from several contractors before hiring one. You can ask friends and family for referrals or do an online search for reputable local remodeling companies. Once you’ve found a company that matches your budget and vision, you can schedule a consultation to get started.
Materials
The materials you use throughout your bathroom remodel have a huge impact on your renovation costs and the finished product. Whether you’re going for a sleek, modern look with glass and metal accents or a warm, natural feel with wood and stone, it’s important to choose high-quality materials that are durable and can withstand the unique humidity of bathrooms.
The right materials can also make your bathroom easier to clean and maintain. Using a material that is waterproof, easy to wipe down, or resistant to stains can help reduce the time and effort it takes to keep your bathroom looking its best.
If you’re unsure what materials to select, our team of experts is happy to advise on the best options for your project. We can show you samples and explain the benefits of each to help you decide what’s right for you.
You’ll need to carefully consider the material you choose for your vanity countertops, flooring, shower stall walls, and more. We recommend starting with your design style, then identifying the functional requirements of the space. For example, if you’re adding a shower bench, you’ll need to ensure the bench is stable and waterproof. Similarly, you’ll want to ensure any storage spaces are water-resistant or able to hold your towels.
The materials you choose for your bathroom should be durable enough to withstand the daily wear and tear of being constantly exposed to moisture, heat, and chemicals. Some materials are more likely to stain or chip than others, so it’s essential to do your research and find out what will work best for you.
Once you’ve decided on the materials you want to use, it’s important to line up your supplies and order them in advance of your bathroom remodeling start date. This will help prevent delays and ensure that your project is completed on time. It’s also a good idea to map out the location of any existing utilities and electrical hookups to avoid any damage during the remodel or unexpected expenses down the road. We also recommend investing in a wet-dry shop vac to help you clean up any debris or spills during the remodel.
Installation
While the decision to remodel or renovate your bathroom is a personal one, you should think about how it will impact your house’s value when you decide whether to invest in this project. If you are planning to sell your home in the future, remodeling is a smart move because it increases the efficiency and aesthetics of the room. However, if you are living in your home for a long time, you might be better off with renovating the space to refresh it with new fixtures and accessories.
There are many different ways to upgrade your bathroom, but the most important thing is that you stay within your budget and stick to a realistic timeline for the project. If you can do this, you will avoid committing to a project that is too expensive and end up with dreaded buyer’s remorse.
If you’re doing a full-scale remodel, your contractor will begin with demolition to prepare the room for new fixtures, cabinets, flooring and walls. This process will be a bit disruptive, so it’s important to find a company that prioritizes safety and will shut off the water and electricity before beginning work. Once the demolition is complete, your service professional will replace any load-bearing walls and change the layout of the bathroom.
After the walls are hung, your contractor will install the shower and tub, sinks, vanity and mirrors. This step may require the assistance of a plumber if the plumbing needs to be moved. Your service professional will also install new tile and countertops and hook up the new faucets and hardware.
The final step in bathroom remodeling is to install the lighting, fans and accessories. Lighting comes in a variety of styles and finishes, so it’s important to choose products that complement your design style. Fans should be chosen based on both noise level and airflow, while mirrors are available in a wide range of sizes, shapes and finishes.
While you can DIY a lot of bathroom remodeling projects, hiring a professional is the best way to ensure that your renovation goes smoothly and is completed on time. When choosing a professional, make sure to ask for references and check their reputation in the industry. They should be licensed and insured, so you can feel confident that they will do high-quality work.